
What an AI object remover does
People search for an AI object remover when a photo is almost right except for one thing in it: a stranger who walked into the shot, a sign, a bin, a cable, a stray cup on a table. They do not want to retake the picture or learn a heavy editing program. They want the thing gone, and they want the gap to look as if it always belonged there.
That is the whole job. An object remover takes away part of a picture and fills the space from what surrounds it, so the scene carries on where the object used to be. The searches remove people from photos and remove a person from a photo describe the same job, with a person as the object.
How the Eraser works in FlowPix
FlowPix does this with the Eraser tool on the canvas. Put your photo on the canvas, select the picture and open the Eraser. Set the brush size, paint over what you want gone and press Run. FlowPix removes what you painted and fills the gap from the surrounding picture. The rest of the picture is meant to stay as it was. The result comes back as a new erased picture.
One thing is worth saying plainly, because it decides how you work. You paint the area yourself. There is no text box where you type remove the man on the left, and FlowPix does not detect people or objects by itself. The chat does not erase for you either. The Eraser is the tool that takes things out, and you choose what goes by choosing where to paint.
This has a useful side. Because you point at the thing, nothing is left to guess when there are several people or objects in the frame. You decide which passer-by goes and which friend stays.
How to paint the area
Start with the brush size. A large brush covers a whole person quickly, while a smaller brush follows edges more closely, around a hand, a bag strap or a lamp bracket. Change the size as you go. It is normal to use a big brush for the middle of a shape and a small one for its edge.
Paint the whole thing you want gone, including its edge, and not much more. Everything under the paint is replaced, so a loose scribble that also covers a letter on a sign or a fine pattern on a wall will lose it. If the object leaves a shadow or a reflection that you also want gone, paint that as well, because FlowPix removes only what you painted.
If the first run is not right, you do not have to accept it. The result is a new picture, so your original is still there. Paint again with a smaller brush, or run a second pass on the part that is still wrong.
What it handled in our tests, and the limits
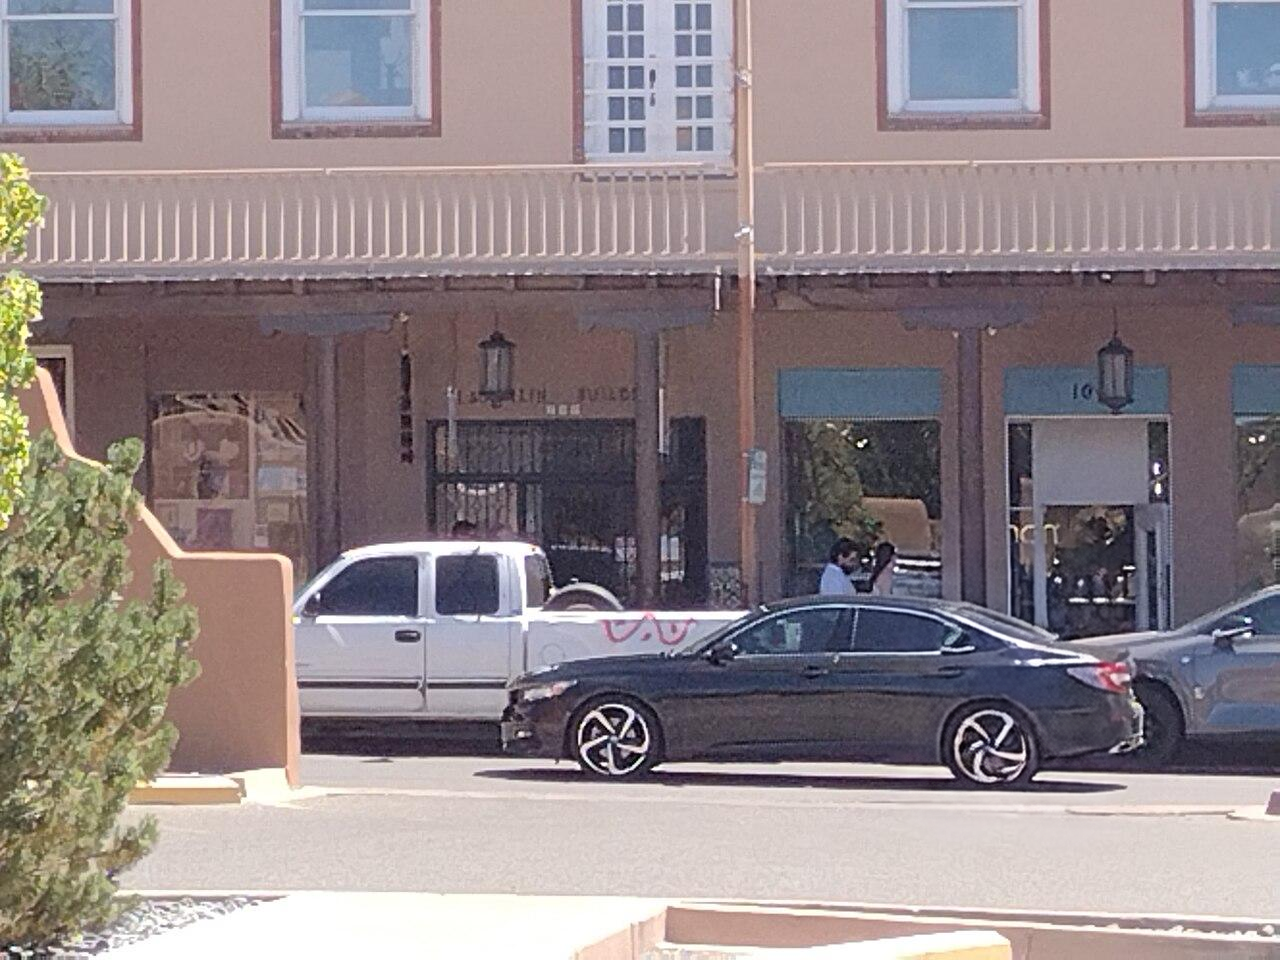
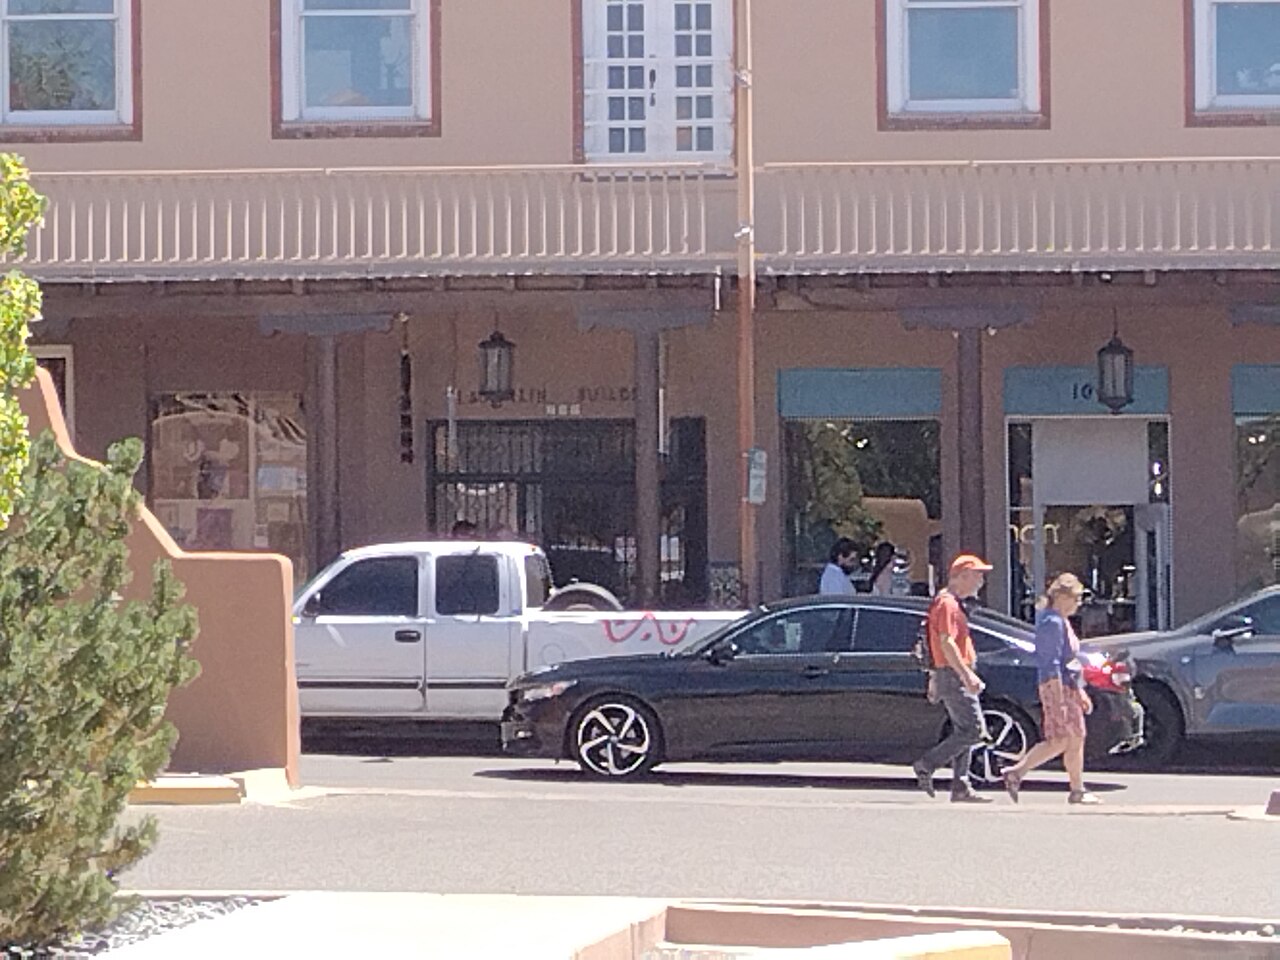
We tried it on a street photo. Two passers-by standing in front of a parked car were removed cleanly, and so was a small lamp hanging on a wall. These are the kind of jobs the tool is meant for: a limited object against a background that continues in a believable way.
The limits are real, and you should know them before you start. Whatever lies under the painted area, such as letters, fine lines or a pattern, is lost or invented, so paint only what you want gone. Bigger areas are harder than small ones, and so are busy, complex backgrounds, and they may need a second pass or a smaller brush. A person standing in front of a very detailed background can leave a visible seam where the fill meets the rest of the picture.
So treat each result as a good first version, not as a promise. Two tests worked well. That does not mean every photo will, and the only way to know is to look at yours.
Common jobs: people, signs, bins and clutter
Travel photos are the classic case. A passer-by in a street picture is easiest to remove when the person is fairly small and the background behind them is simple, such as pavement, a plain wall or sky. It is harder when the person overlaps a crowded shop window or a pattern of railings. In that case use a smaller brush and expect that you may need a second pass.
Product photos often have a small thing in the background that should not be there: a bin, a sign, a cable, a bright reflection of a stray object. Paint over it, run the Eraser and check that the edge of the product itself was not touched. Keep the brush well away from the product, because the product is exactly what you do not want to repaint.
Family photos often have a stranger in the background. Paint the stranger and nobody else, run the Eraser and then look closely at the people next to the gap. The rest of the picture is meant to stay as it was, but a careful look at faces and hands is the right habit for any picture that matters to you.
How to check the result
Always compare with the original. Use the before and after slider, or put the two pictures next to each other on the canvas. Then zoom in on the filled area and on its edges, because a result that looks right at a glance can look different up close.
Look for the usual signs of a fill that was not quite convincing. A line that bends where it should run straight, such as a horizon, a kerb or a tile joint. A pattern that repeats or smears. A soft patch that does not match the grain of the rest. A seam at the border of the area you painted, especially behind a person who stood in front of a detailed background.
If something is wrong, go back to the original and paint again with a smaller brush, or run a second pass on the area that is still wrong. If it still does not work, a different crop or the original photo may be the better choice. You decide when it is good enough.
Use it on your own pictures
The Eraser is for your own pictures. It is not meant for removing watermarks, credits or copyright notices from pictures that are not yours, and it is not for changing photos that must stay true, such as evidence or documents.
For ordinary photos, tidying up is your call: a passer-by, a bin, a sign, a cable. Keep the original, because an erased picture is a changed picture, and if you share it as a record of an event, remember that it has been edited. That small habit saves you from having to start again later.